Plop Boot Manager is a small program to boot different operating systems and for chain-loading other partition boot codes.
By default Plop will shoe you all primary partitions of that disk where you have installed Plop to MBR codes but you can also chain-load extended partitions also.
INDEX:-
# Why use plop?
# some important features.
# which other boot-loader you can chain-load?
# Important main menu Hot-keys.
# How to install Plop to USB ?
# installing plop using Syslinux/Isolinux/Extlinux/Grub4dos/Grub2/DOS/Lilo boot-loaders.
# Chain-loading plop using other boot-loaders.( without installing )
# General terms and definitions.
# How to chain-load operating systems from primary partitions using plop?
# How to chain-load Operating system from Extended partitions using plop?
# How to boot from USB Drive or Flash memory card , if BIOS not support booting from USB?
# some examples.
#>> How to configure windows to boot using plop.
#1. Why use Plop?
-->> plop is very useful and very popular boot loader, if you take a look about its features than i think you will be able to think about, why use Plop. like, plop make possible to boot from network, USB, floppy,even if your BIOS does not gives you this power, and you can add up to 16 boot entries into plop boot menu. so using plop you can customize your MULTIPART-MULTIBOOT USB or you can extend the features of your BIOS.
#2. some important features.
~ USB boot without BIOS support (UHCI, OHCI and EHCI)
~ CD/DVD boot without BIOS support (IDE) , Floppy boot
~ Define up to 16 partitions and 16 boot profiles
~ No extra partition for the boot manager ( as XOSL require one extra primary partition )
~ Hide partitions
~ Password protection for the computer and the boot manager set-up
~ Backup of partition table data
~ changing partition ID
~ Start of the boot manager from hard-disk, floppy, USB, CD, DVD
~ You can run the boot manager over the network
~ you can also customize the boot profiles data. ( boot entries, maximum length is 16 chars.)
#3. which other boot-loader you can chain-load.
-->> you can chain-load any boot loader using plop which are listed below.
LiLo
Syslinux
Grub
Grub4Dos
Grub2
Windows boot.ini ( windows NT/XP )
Windows BCD ( for windows vista/7/8/8.1 )
#4. Important main menu Hot-keys.
Cursor up/down >>
Move the bar
Enter >>
Choose selection
ESC
>>
Close window
CTRL - ESC >>
Switch to text mode
CTRL - PAGE UP >>
Switch to higher screen resolution
CTRL - PAGE DOWN >>
Switch to lower screen resolution
z >>
Enable/Disable window zoom animation
1-9 >>
Boot profile
q
>> Quick boot, open a list of all possible hard-coded partitions to boot
w >>
Write MBR with the profile settings, but do not boot
f
>> Boot floppy
c
>> Boot CD/DVD
u
>> Boot USB
n
>> Network boot ( Pxe booting )
#5. How to install Plop to USB .
-->> Easiest way to install Plop to your USB Drive or Flash Memory card is, give a try to BOOTICE smart utility. ( free-ware / windows based )
-->> for Linux Users.
1. download ( http://download.plop.at/files/bootmngr/plpbt-5.0.14.zip )
2. extract ZIP archive to any folder.
3. open your Linux konsole and install plop using Linux executable files under the extracted folder.
4. after extracting the files, folder tree will looks like this.
| 1README.TXT
| licence.txt
| plpbt.bin
| plpbt.img
| plpbt.iso
| plpbtrom.bin
|
+---doc
| liesmich.html
| liesmich.txt
| readme.html
| readme.txt
|
+---experimental
| \---usb4ksector
| 1README.TXT
| plpbt.bin
| plpbtrom.bin
| plpinst.com
| plpinstc.com
|
+---install
| plpbtin.img
| plpbtin.iso
| plpinst.com
| plpinstc.com
|
+---Linux ############### for Linux users ###############
| 1README.TXT
| plpbt.bin
| plpbtrom <<-- Linux executable
| plpbtrom.bin
| plpcfgbt
| plpmkboot
| #################################################
+---pcmcia
| | plpbt.bin <<-- run plop without installing -->>
| | plpbt.img
| | plpbt.iso
| | plpbtrom.bin
| |
| \---install
| plpbtin.img
| plpbtin.iso
| plpinst.com
| plpinstc.com <<-- can be used as Linux kernel for installing plop
|
\---Windows ############ for windows users #############
1README.html
InstallToBootMenu.bat
InstallToMBR.bat
plpbt.bin
plpbt4win.exe
plpbtrom.bin
plpbtrom.exe
plpcfgbt.exe
plpcfgbtGUI.exe <<-- this is GUI for installing plop to USB
plpinstc.bin
plpmkboot.exe
3. Installing plop using syslinux/Isolinux/Extlinux;-
label plpinst
linux plpinstc.com
4. Installing plop using Grub4dos;-
title Install Plop Boot Manager
root (hd0,0)
kernel /boot/plpinstc.com
#6. Chain-loading plop using other boot-loaders.
<< chain-loading and booting plop without installing >>
1. using syslinux/Isolinux/Extlinux
label plop live boot
linux plpbt.bin
2. using grub4dos;-
title Plop Boot Manager
find --set-root /boot/plpbt.bin
kernel ()/boot/plpbt.bin
#7. General terms and definitions.
1. Devices Notations;-
HDA = Hard disk 1
HDB = Hard disk 2
HDC = Hard disk 3
HDD = Hard disk 4
<< extended partition will be treated as one primary partition >>
2. Editing MBR boot codes/importing boot codes;-
This is used to change the values of partitions in the MBR.
BP means boot manager partition.
This values are stored in the boot manager.
P1-P4 this are the current values of the primary partitions in the MBR.
You can edit the hexadecimal values in the partition table. select a row with s (select) and paste the values to the row where the cursor is with p. With this function, you can import partition values to the boot manager or change values in the MBR.
3. Show in main menu;-
By default plop will shoe only primary partitions in boot menu, but you can add what you want.
4. Linked partitions - hot-keys
b >> set boot partition.
~ You select, what partition you want to boot with this profile. The boot manager set a bios drive number automatically. It's possible to change it with another key.
c >> clear partition.
You set this entry to "cleared" and the boot manager clears this entry in the MBR when you boot this profile.
d >> don't touch.
You set the entry to don't touch and the boot manager does not change this entry when you boot this profile.
e >> edit boot flag.
The boot flag has the bios drive number used by the boot sector routine. In some cases it's required to change this value.
r >> remove boot flag.
Here, you remove the boot flag from the profile.
l >> set logical partition.
~ You can set to boot from a logical partition 1-4 of an extended partition. Change the logical number by pressing "l". L1 = first logical, L2 = second, ...
5. Master password;-
~ Setup the master password. Disable the boot manager password protection with an empty password.
6. Setup password;-
~ Setup the setup password. Disable the boot manager setup password protection with an empty password.
7. Profiles for boot menu;-
~ Profiles are used to start different operating systems from different hard disks and partitions. It's also possible to detect changes in the MBR made by other software and import or forget the changes.
9. Clear partition data
~ Clearing the data means clearing of the partition data in the boot manager. The data on the partition itself is unchanged.
#8. How to chain-load operating systems from primary partitions using plop?;-
1. After installing plop to MBR of your Hard-drive or other memory device, when you try to boot from usb than by default it will show you all primary partitions of your usb/memory device.
and you can select any one them from the boot entries.
2. If you are facing any problem than the main reason will be the PBR boot codes. PBR stands for partition boot record , boot codes.
3. hence, you have to install proper boot-codes that particular partition of your usb drive.
<<<< for windows users there is a utility, named Bootice, which will make your life easy >>>>>>
select your memory device >> process PBR >> choose any one boot loader and install to that particular partition .
<< how easy it is , if are using Bootice >>>
#9. How to chain-load Operating system from Extended partitions using plop?;-
1. first of all, install appropriate PBR boot codes to that partition , which are required to boot that operating system without any other boot-loader.
2. for example, if you want to run LinuxMINT than you have to install GRUB2 to PBR of that partition where you have installed LinuxMINT.
or
If you want to boot Windows-vista/7/8/8.1 than you have to install " BOOTMGR boot record " into that partition where you earlier installed windows.
3. here I will show you how to configure plop to chain-load from a logical partition.
~ boot using plop boot manager
~ Set-up >> Profiles >> move the cursor to a blank entry ( using up/down keys) and press enter.
~ Edit label >> fill a name for boot menu.
~ Show in main menu >> press enter
~ Linked partitions >>before proceeding towards this step , first check the steps below.
-->> find out the number of that extended partition, ( go to Setup >> Partitions >> select any partition and press enter, here you will see the properties of that partition, which is just front of the menu "Partition ID".
In this tutorial I am using " HD0-3 " extended partition, means the fourth primary partition of my usb drive. ( extended partition is also a primary partition )
~ Linked Partition >> In " HDA main menu" >> move the cursor to fourth label and press ' B ' hot-key ( set boot partition ) and than press ' L ' hot-key ( use logical partition ), press ' L ' continuously until you get that particular logical partition , defined as " L1, L2, L3, L4".
~ press "ESC" and again "ESC" , plop will prompt you to save the new configuration settings. press " Y " and move to main boot menu.
~ now you can see the boot entry which we add just while.
#10. How to boot from USB Drive or Flash memory card , if BIOS not support booting from USB? ( using plop )
~ Install plop to the MBR boot codes of your PC/Laptop internal Hard drive.
~ configure plop to boot your pre-installed operating systems.
~ press ' B ' key or just enter the " USB " sub-menu in the main menu.
#11. How to configure windows to boot using plop.;-
~ Install plop to MBR boot record of Internal hard Drive.
~ Run Bootice as Admin access and Install " bootmgr boot record " to that partitions PBR where you have installed windows ( In case if have installed multiple windows operating systems )
~ reboot >> plop main menu appears >> go to set-up >> profiles >> Edit labels >> rename according to your operating system and save the configuration so that when you again boot your system than you will not confuse which boot entry belong to windows 7 or which belong to Linux.
<< Never try to play with this option until you don not know what you are doing >>
#12. I have made a multipart-multiboot USB using plop and bootice with these operating systems
1. Hiren Boot Disk
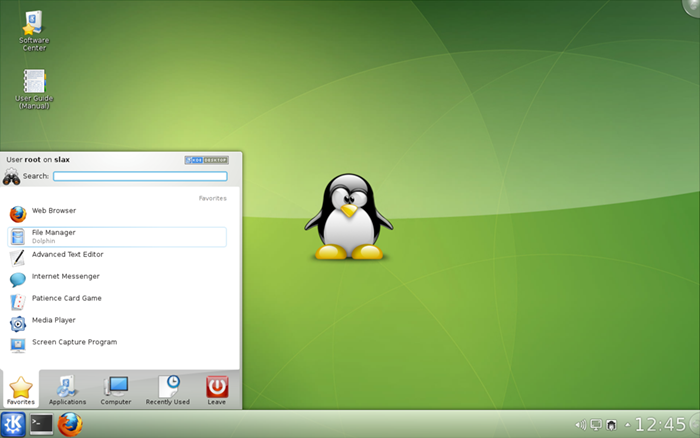
2. slax
3. puppy
4. Puppy studio
5. win-PE
6. Linux-MINT live
I will discuss later how i made this using only two small utility Bootice and Plop.
######


--001.png)


